Creating a collection on ARTDEX is a great way to keep your art organized. Whether it’s an actual collection you own, an inventory of your gallery, or your personal portfolio, it all works the same way.
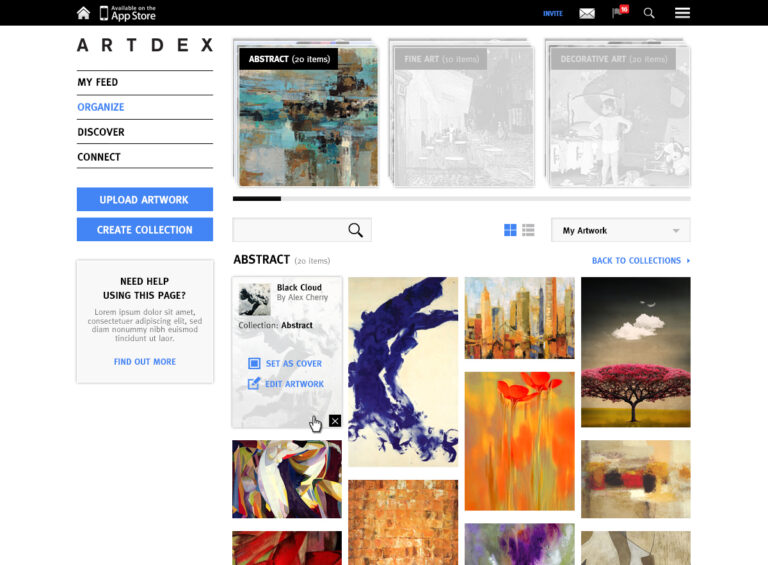
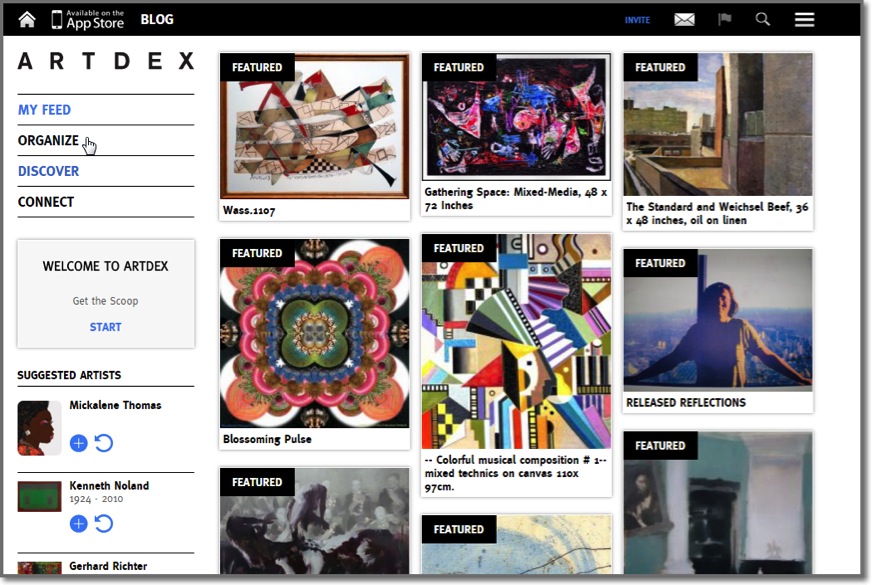
The first step is to navigate to your artwork by clicking “Organize” from the side navigation menu.
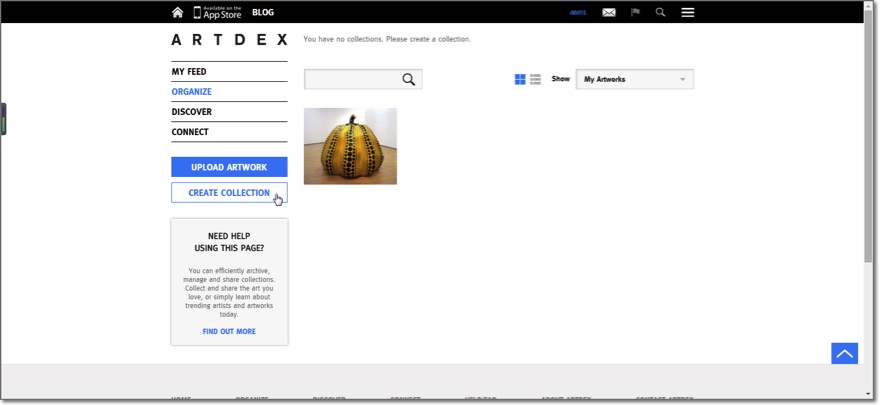
From there, click the “Create Collection” button on the left side of the screen.
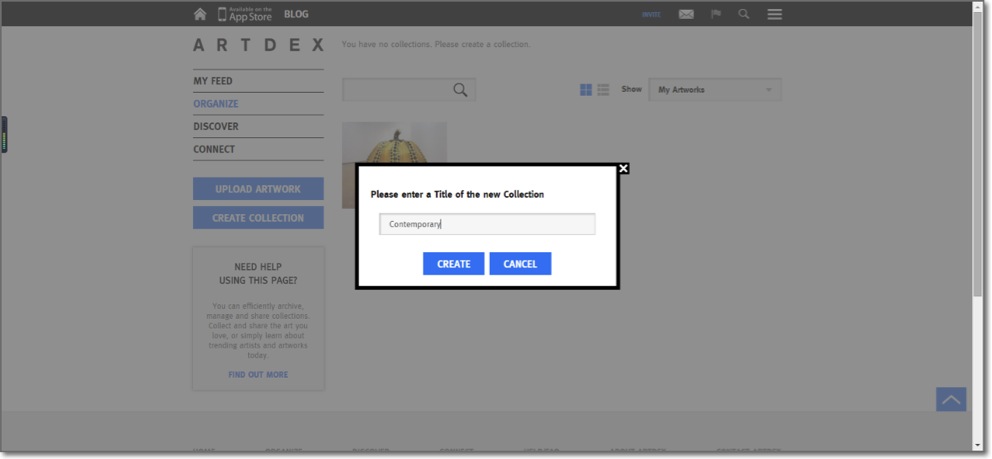
A pop up will appear prompting you to enter a title for your new collection. Type in the title you’d like and click “Create.”
Voila! You’ve just created a collection. Now, it’s time to add artwork to that collection.
There’s two ways to add artwork to a collection:
1. Drag & Drop
The first way is through drag and drop. If you’re on the Organize page, you’ll see the collections you’ve created at the top of the screen and the artwork you’ve uploaded at the bottom.
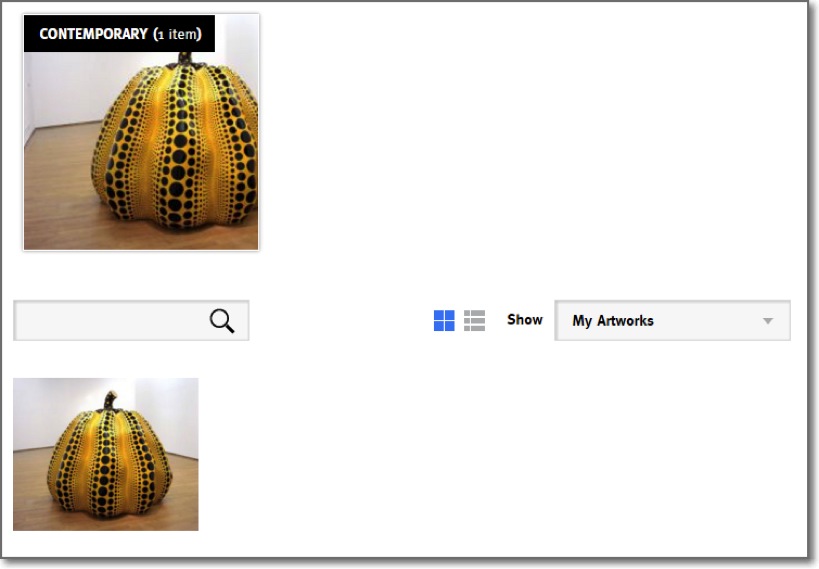
To organize your artwork and add it to a collection, simply select the artwork at the bottom of the screen and drag it into the desired collection.
2. Selecting the Collection When Uploading Artwork
The second way to organize your artwork into collections is by selecting the collection while you’re uploading the artwork.
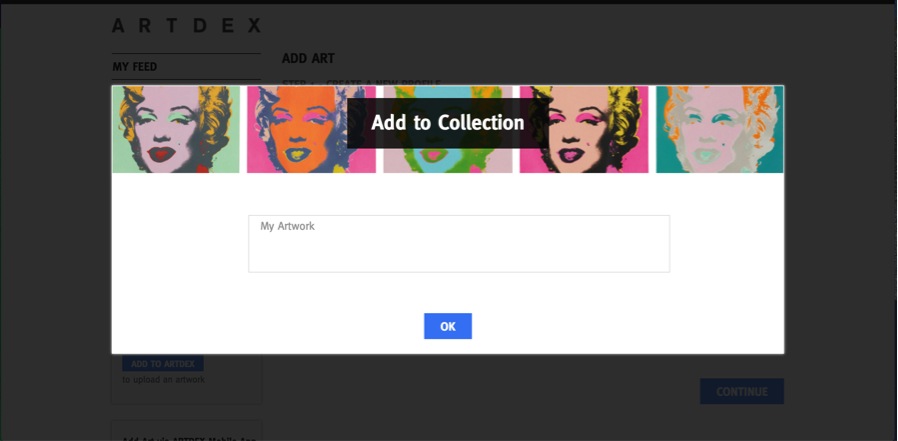
When uploading artwork (on the first screen where you enter the artist’s name and the title of the artwork), you’ll see the option “Add to Collection.”
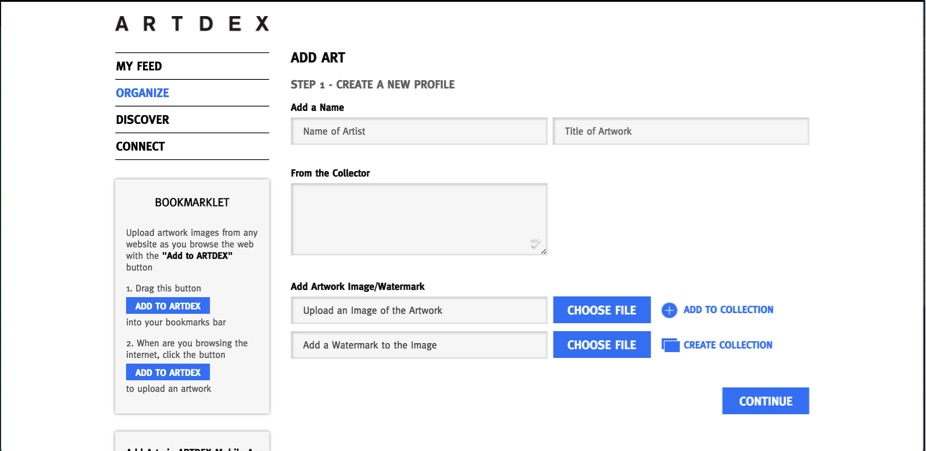
When you click “Add to Collection” a pop up window will appear with a list of your collections. Select the collection where you’d like to add the artwork and hit “Ok.”
Finish the rest of the upload process and upon completion you’ll find your newly uploaded artwork organized in the collection of your choice.
Still have questions? Check out our FAQ page or shoot us a note at staff@www.artdex.com. Happy ARTDEX-ing!

